hjk6 Strategy –
Milo234

This explanation of how to play hjk6 will be given systematically in terms of how the game progresses:
- Scouting
- Build Orders/Placement
- Fighting Strategies
Scouting
The first part of the game on hjk6 always begins with scouting the map and I will explain how I scout hjk6. I scout hjk6 in 3 parts:
- Scouts to each hole
- Guards
- Formation Scout the middle
- Scouts to Holes - First I send 5 scouts to the other five holes. This step is very simple and goes quickly. Later on when the rest of the scouting is done, I like to Q my dudes around inside the holes and thus uncover more of the holes. This is very important for later on in the game if your opponent should send mcvs to different holes. You need to be able to see what is going on in each hole, how much money is left, and other things.
- Guards – The next step is to set
up guards. There are two ways to do this. The easier simple way is to make
a ring of guards outside of your hole’s entrance.
Place the guards spaciously around your hole. Try to block off enough of
the area so that if your opponent doesn’t know what team you are, he won’t
be able to tell by sending a scout to your hole. It is also important to
spread your guards out so that they don’t get in the way of deploying buildings
or moving units around.
Insert Guards Pictures
The second way to place your guards which I like to do always in 1v1 is to create a large line of guards that block off an entire 3rd of the map as shown in the picture below. This is impossible to do without using bookmarks, but once you are used to using bookmarks, with a little practie it becomes simple to do. Since I am guessing where I place my guards in the dark, they often get placed in a not too straight line, but this is usually good enough to prevent all but 1 of the enemy’s scouts from slipping by into the opposite hole and ends up killing all of the formation scouts, effectively blocking about 1/3 of the map.
Insert Advanced Guards Pictures
- Formation Scouting the middle – This
step is very straight forward. If you were to line up 6 riflemen along one
edge of the map, you could then send them all across the map, thus
uncovering the entire middle. I call this technique formation scouting. I
do not line up my dudes then send them however, I q each one individually.
This involves constantly using bookmarks to go back and forth. I set one
bookmark at my barracks and one along the wall. Doing this I can go to my
barrcks and select a rifleman, then Q him to the wall, then
scroll across the middle and q him to the other wall. This may seem rather
difficult at first, but with a little practice it becomes easily doable.
Insert Formation Scouting Picture
When all of the above three steps are accomplished and you have spare time, you should Q your first hole scouts around inside their respective holes. This is important to do so that you can see more of what is inside each hole and aren’t wondering what your opponent is doing in any hole when the game progresses to later stages. Using this scouting method it is not particularly difficult to uncover more than 90% of the map (excluding your base and your opponent’s base.
In 2v2 and 3v3, I might vary this a little bit. If I am worried about an infantry rush I might not send scouts to all the holes and just focus on my opponent above/below me. If you are concerned about the immediate situation in your part of the map, applying the formation scouting technique in a north-south pattern can be effective as well.
Build Orders
Allies
Order 1 - p p b o w (truck) s w w (truck) w a o w w o
Order 2 – p p b o s w (truck) w w (truck) w a o w w o
Order 3 – p p b o w (truck) s w w (truck) s w a o w w o
Comments about the Order
- The first thing to notice is that these orders only really differ in where to make the silo. In order 1 the silo is there to just serve as a money containing silo in case the ore trucks mine more gems than the ore ref can handle. It would be a waste to just throw out the extra gems and this can sometimes be the difference between running broke for just a second or not. In order 2 the silo serves as a placement silo. Tanks are not very smart, and when you are south on hjk6, the tanks will sometimes go running around through the inside of your base and crawl along the ridge before leaving the hole to go join your outside forces. To prevent this, you can make a silo before your first war in order to get the war factory just high enough so that you will not have this problem. Order 3 uses 2 silos. If you wish to make 2 silos, unless you need them to extend your base (such as with some crazy TL building position), it is best to place the silos in the upper corners of your ore refinery. Having 2 silos in the upper corners of the ore refinery will make the ore trucks waste less time when they get stuck around your ore refinery, and this can mean a lot more money for you. I like to spread out the 2 silos. Making 2 silos together can put you a couple of seconds behind your opponent in tank producing, and since the silos aren’t particularly helpful unless you have 3 ore trucks mining on one ref, there is no urgent need to have them until you get your second truck.
- This build requires 2 trucks, or you will run out of money sooner. The above orders with one truck first thing and one truck at third war are the standard ways to make the trucks. Sometimes you can get away with making 2 ore trucks first thing if you are very concerned about running away with cash, but this can obviously have detrimental side effects in your tank count should you get rushed. It is possible to not make your first truck until your 2nd war factory as well. Some people I have known liked making 3 tanks first then making the first truck at 2nd war factory. This can be faster since it saves scrolling time as well as gets tanks out sooner, however it also brings about the issue that you will have less money. Sometimes you can wait to make 2nd truck until your fourth war, but that requires extreme confidence in your money management skills.
- The two powers at the start are standard and serve two purposes. The first is obviously to give you power and postpone having to make another power plant for some time. The second purpose is to help extend your base towards the hole entrance as well as to get your ore refinery in a better position. The advanced power plant comes in at a convenient time to make and if you don’t make it then you will be lower on power after making an ore refinery.
- Trying to make more than 4 wars on only one ore ref will result in money problems from all spots except TL, and to make it work from TL you need a special placement that is rather terrible and requires excessive ore truck management. Also, making a 5th war factory doesn’t help a lot. As allies, medium tanks build the same speed on 4 wars as on 5 and thus having a 5th war factory won’t help very much unless you want to make light tanks which build at maximum rate on 5 wars, however you will still have to worry about the fact that money will be getting relatively low. Thus making a 2nd ore ref after 4 wars is the best time.
Soviets
As I said the last time I updated, I have played some more
hjk6 as
Placement
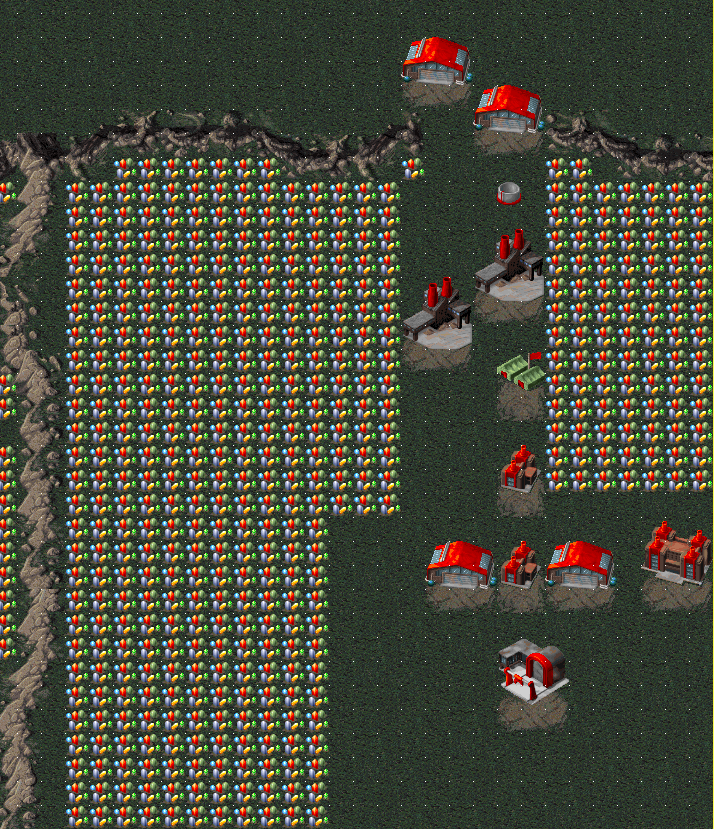
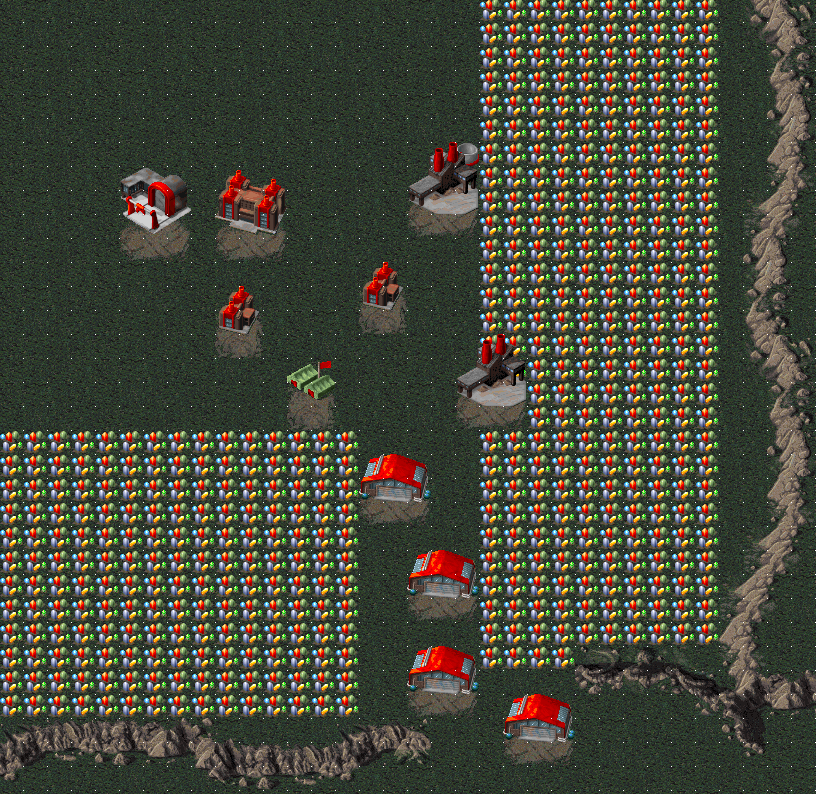
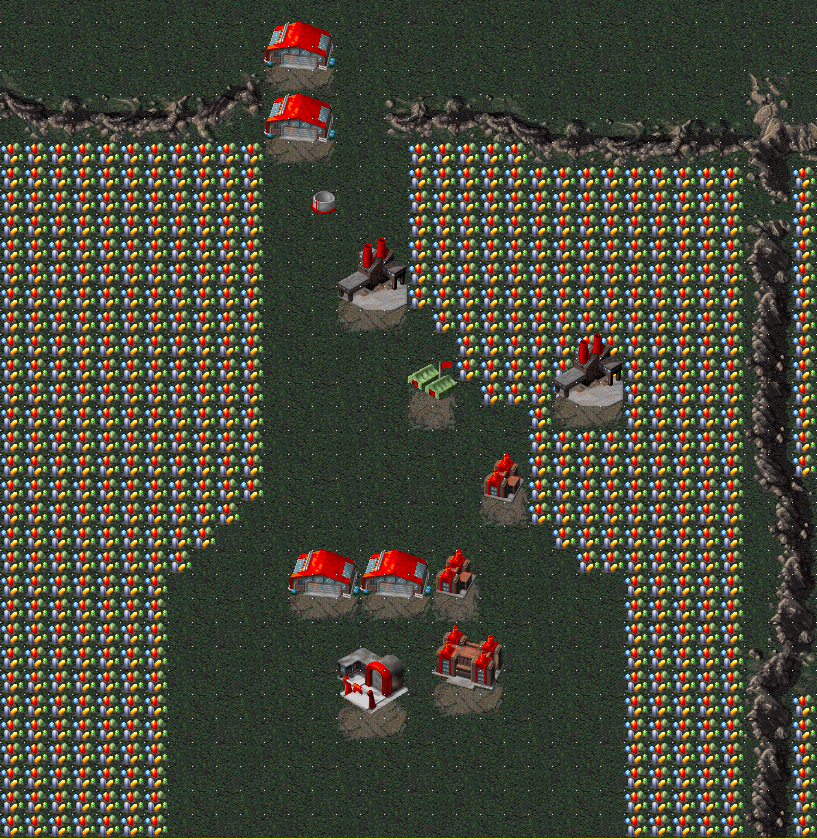
The hole entrances on hjk6 are all very small. None are more than 6 squares wide except the TL hole and thus it is EXTREMELY easy to defend rushes on hjk6 in general. Just placing a war factory in the entrance to the hole will make it almost impossible for the enemy to get in, thus your first objective in placing buildings should be making sure that the ore ref is in a good location and the second should be making sure that the hole is blocked as soon as possible. Many players from westwood that I have played with (including myself at first) have an inclincation to spread out all of their base even after getting to the hole entrance, but this is generally not a good idea. War factories should be kept close to the hole initially and spread out later. A spread out base on standards is the best way to protect since the tank counts never get very big, but on hjk6 with lots of money, large quantities of tanks can be produced and the easiest way to defend from large numbers is to put buildings close together. It is also a good idea to put one war factory in the back of your base near your CY so that whenever you may need to CY you can pop out MCVs and have plenty of space to deploy them.
Here are pictures of
my prefered placements to 2nd ore ref.

Insert Downloadable
Map File with my prefered placements
Fighting Strategies
The first obvious tactic to try on any map is base rushing. On hjk6 you will quickly find that against any half decent opponent this will never work unless the enemy is TL (and even then your chance of success is relatively small from all the way across the map).
So the next obvious thing to try is straight cying or some
combination of tanking/cying. Being that the map is so big you could imagine
you might have a chance if you are south and soviets. I was informed that
shortly after hjk6 was made players did indeed believe for a time that straight
cying was the best way to play hjk6, however that changed when the idea of
using bookmarks came about and people began getting better at tanking on a
large scale as time went on. If you try straight cying against a good opponent
your chances of surviving the initial attack are extremely low if you are north
and still a
So this brings us to the last obvious choice and in all likelihood the best way to play hjk6, str8 up tanking. As is obvious by the build orders, hjk6, is all about tanks. Conditions are optimal for large scale tank fights, lots of money, impossible to rush holes, and enough space to make it an interesting battle. In the long run if one of the players is not a better tank fighter, what really matters is money. Whoever can get the most money and thus make the most units will win. Therefore it is extremely important to control the middle of the map. This leads to the Half Way Rule. BM is the most important place on the map to control for a large number of reasons. First, if you control BM you control half of the map at least and have south advantage. Second, if you are north and worried about the enemy getting underneat you, it is the perfect place to fight/blockade. Lastly if the game turns into cying it is the absolute most important place on the map to control.